In this post, I try out the open source documentation tool Read The Docs to see how it can help me out with future projects.
Table of Contents
Introduction
Read the Docs is an open source tool for creating documentation. It uses the Sphinx documentation generator and is free for public repos. It offers the following features:
- Free hosting for all documentation.
- Documentation available in online and offline formats.
- Automatic builds in response to Git commits.
- Document versioning in response to Git branches and version control settings.
Having recently uploaded my first GitHub repo, I’m keen to see how Read The Docs can help me with my documentation. Read The Docs has a tutorial on their site that I will be using here.
Tutorial Time
I begin by accessing the Read The Docs tutorial GitHub template and use this to create a repo on my GitHub account. I then sign up for a Read The Docs account and authorise it to interact with my GitHub account:

This allows Read The Docs to view the public repos in my GitHub account. They are then displayed in my Read The Docs console:
I select my ReadTheDocs-Tutorial repo and Read The Docs immediately starts building the documentation for it. Builds usually take around 30 to 40 seconds and Read The Docs gives updates throughout the process:

The end result is a site like the one below:
So far everything has been going well. What will happen when I try it out with the GitHub repository I made last time?
Going Solo
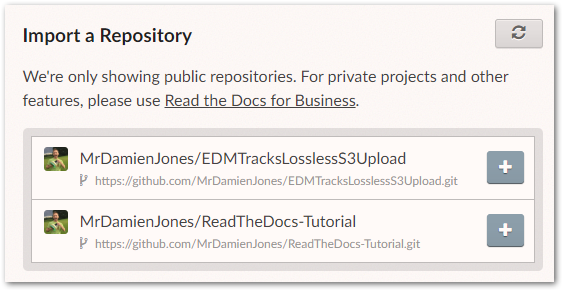
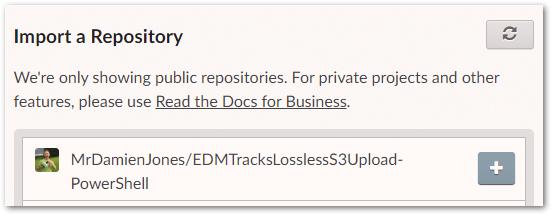
I start by importing my EDMTracksLosslessS3Upload-PowerShell GitHub repository into Read The Docs:
As before, the build takes around 30 seconds and gives me a link to my documentation. This time the site shows an autogenerated template instead:
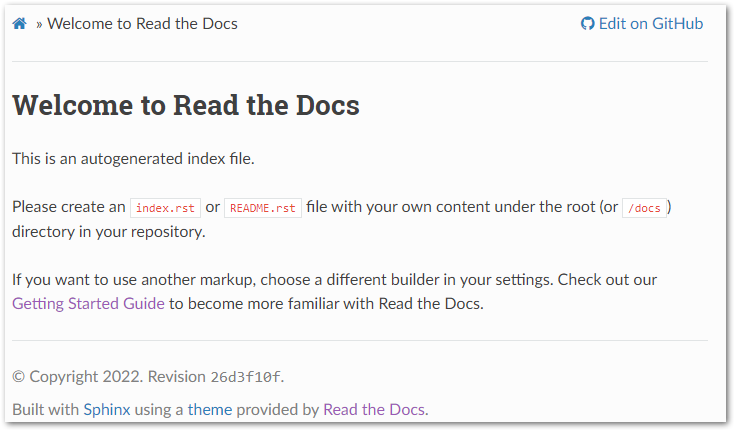
This is because there is an important difference between the repos. The ReadMe in my repo is an .md (Markdown) file, whereas the Read The Docs tutorial documentation uses.rst (reStructuredText) files.
As .rst is the default plaintext markup language used by Sphinx, neither it nor Read The Docs can do much with .md files out of the box.
I’m currently getting to know Read The Docs and .rst, so I’ll use my tutorial repo for the remainder of this post and let my experiences guide my next steps.
Discovering .rst
Now that I’m more clued up on how Read The Docs works behind the scenes, let’s examine what .rst files look like and how they can be changed.
Included within the Read The Docs tutorials repo is a docs folder, which contains a source folder with four files:
api.rstconf.pyindex.rstusage.rst
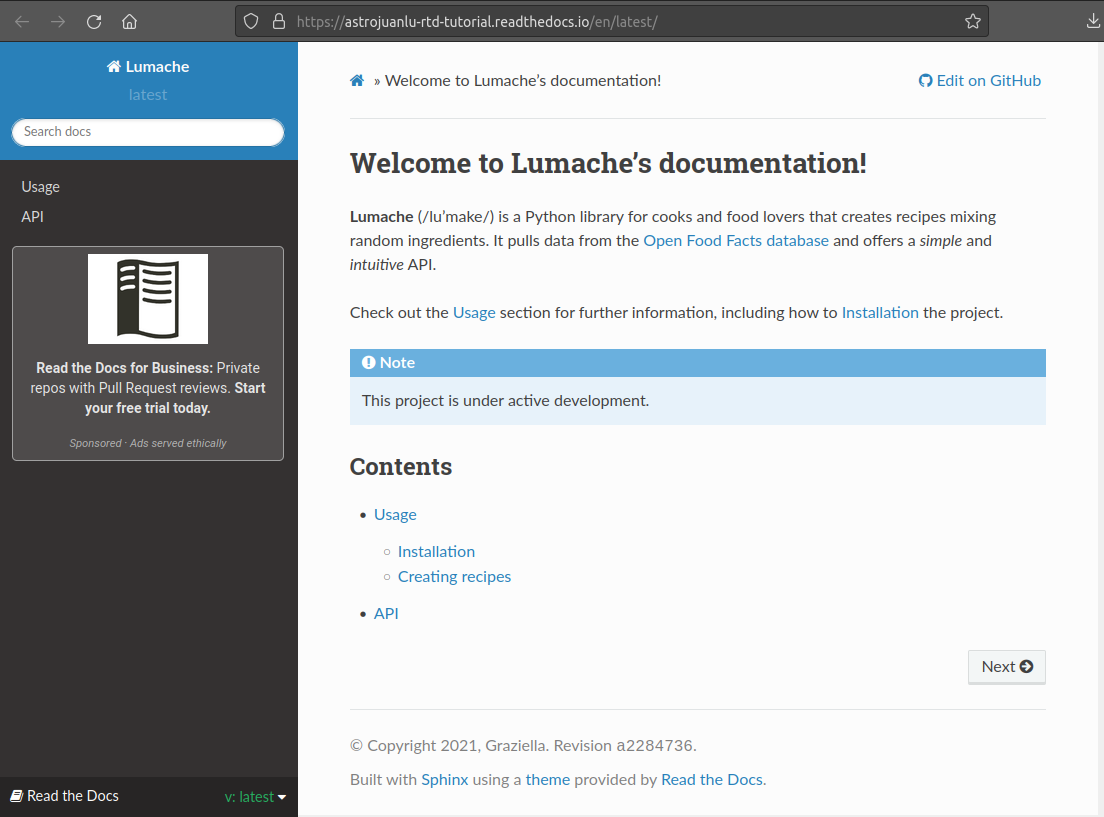
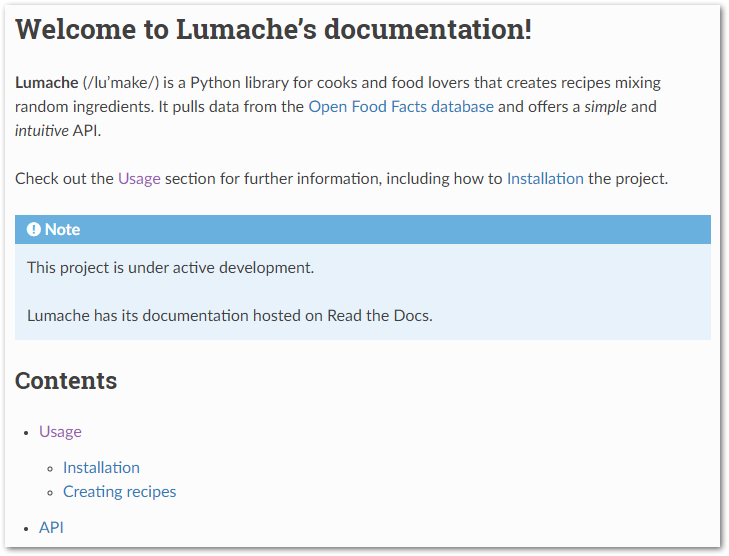
These files mirror the site generated by Read The Docs. For example, index.rst:
Welcome to Lumache's documentation!
===================================
**Lumache** (/lu'make/) is a Python library for cooks and food lovers
that creates recipes mixing random ingredients.
It pulls data from the `Open Food Facts database <https://world.openfoodfacts.org/>`_
and offers a *simple* and *intuitive* API.
Check out the :doc:`usage` section for further information, including
how to :ref:`installation` the project.
.. note::
This project is under active development.
Lumache has its documentation hosted on Read the Docs.
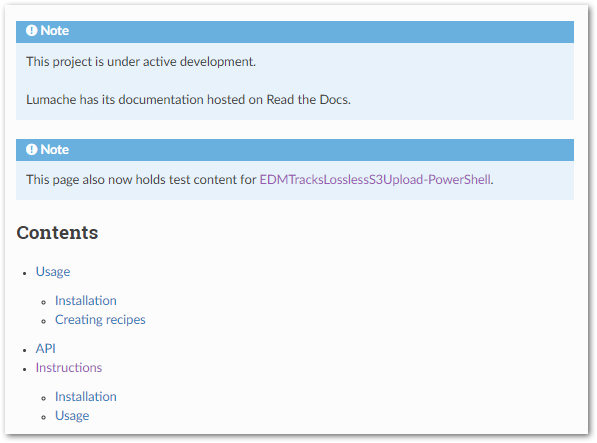
Contents
--------
.. toctree::
usage
api
Mirrors the page at readthedocs.io/en/latest/index.html:
Let’s make some changes. I update index.rst to include new code on lines 18, 20 and 29:
Welcome to Lumache's documentation!
===================================

**Lumache** (/lu'make/) is a Python library for cooks and food lovers
that creates recipes mixing random ingredients.
It pulls data from the `Open Food Facts database <https://world.openfoodfacts.org/>`_
and offers a *simple* and *intuitive* API.

Check out the :doc:`usage` section for further information, including
how to :ref:`installation` the project.

.. note::

   This project is under active development.

   Lumache has its documentation hosted on Read the Docs.

.. note::

   This page also now holds test content for `EDMTracksLosslessS3Upload-PowerShell <https://github.com/MrDamienJones/EDMTracksLosslessS3Upload-PowerShell>`_.

Contents
--------

.. toctree::

   usage
   api
   instructions
I then create and commit a new instructions.rst file with text from my EDMTracksLosslessS3Upload-PowerShell ReadMe:
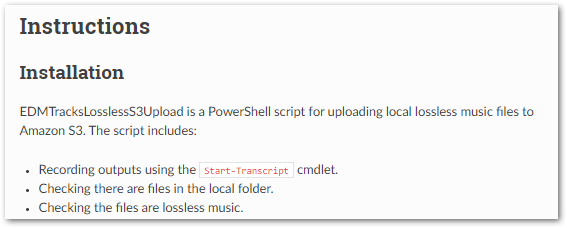
Instructions
=====

.. _instructions:


Installation
------------

EDMTracksLosslessS3Upload is a PowerShell script for uploading local lossless music files to Amazon S3. The script includes:

- Recording outputs using the ``Start-Transcript`` cmdlet.
- Checking there are files in the local folder.

**(Some text removed to avoid unnecessary scrolling)**

Please use the most recent version. Previous versions are included for completeness.

.. _usage:

Usage
------------

When everything is in place, run the PowerShell script. PowerShell will then move through the script, producing outputs as work is completed. A typical example of a successful transcript is as follows:

.. code-block:: console

              **********************
              Transcript started, output file is C:\Users\Files\EDMTracksLosslessS3Upload.log

**(Some text removed to avoid unnecessary scrolling)**

              All files processed.  Exiting.
              **********************
              Windows PowerShell transcript end
              End time: 20220617153926
              **********************

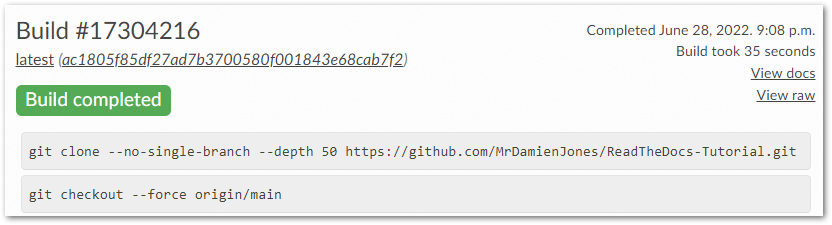
The GitHub commit triggers a new Read The Docs build:
The new build updates the Index page with a new note and additional links in the Contents menu:
A new Instructions page is also created:
Thoughts
On paper, the reStructureText format is compelling. It avoids having a single ReadMe file that can easily get large and unwelcoming. The documentation produced by .rst is comparable to a wiki and GitHub supports it in preview and display modes.
That said, Markdown has embedded itself in more places and has found more buy-in as a result. Applications like Trello, Azure DevOps and, crucially, Visual Studio Code support it out of the box. This gives more opportunities to practise and use Markdown, essentially making it the de facto winner of this unofficial format war.
Although, while Markdown is designed for writing for the web, .rst is specifically designed for writing technical documentation. Support is out there – Sphinx has an .rst tutorial and some .rst previewers exist. The versatility of .rst and its ability to auto-generate documentation and navigation is also of interest.
I’m likely to give it a go when I have some beefier documentation to write and see how it works out. There are still parts of the tutorial I haven’t touched on, and the documentation is, perhaps unsurprisingly, very good. So it looks like Read The Docs would be a good tool to use for the right project.
Summary
In this post, I tried out the open source documentation tool Read The Docs. I made some sample documentation and experienced the reStructureText format for the first time. Then I committed some changes to work with the .rst format and get a feel for how it works.
If this post has been useful, please feel free to follow me on the following platforms for future updates:
Thanks for reading ~~^~~