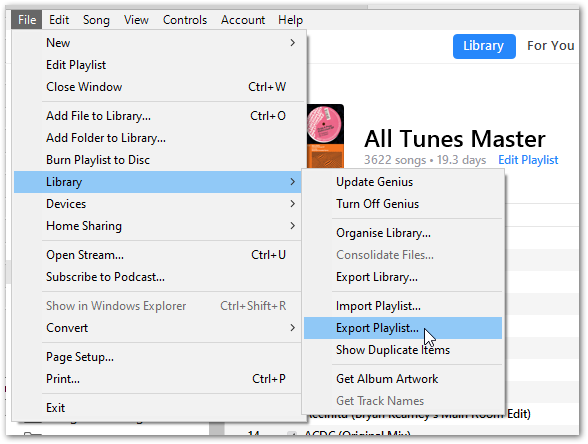
In this post, I will update my existing iTunes Python ETL to return a Parquet file, which I will then upload to S3 and view using Athena.
Table of Contents
Introduction
In my last post, I made an ETL that exported data from a CSV into a Pandas DataFrame using AWS Data Wrangler. That post ended with the transformed data being saved locally as a new CSV.
It’s time to do something with that data! I want to analyse my iTunes data and look for trends and insights into my listening habits. I also want to access these insights in the cloud, as my laptop is a bit bulky and quite slow. Finally, I’d prefer to keep my costs to a minimum.
Here, I’ll show how AWS and Python can be used together to meet these requirements. Let’s start with AWS.
Amazon S3
In this section, I will update my S3 setup. I’ll create some new buckets and explain my approach.
New S3 Buckets
Currently, I have a single S3 bucket containing my iTunes Export CSV. Moving forward, this bucket will contain all of my unmodified source objects, otherwise known as raw data.
To partner the raw objects bucket, I now have an ingested objects bucket. This bucket will contain objects where the data has been transformed in some way. My analytics tools and Athena tables will point here for their data.
Speaking of Athena, the other new bucket will be used for Athena’s query results. Although Athena is serverless, it still needs a place to record queries and store results. Creating this bucket now will save time later on.
Having separate buckets for each of these functions isn’t a requirement, although it is something I prefer to do. Before moving on, I’d like to run through some of the benefits I find with this approach.
Advantages Of Multiple Buckets
Firstly, having buckets with clearly defined purposes makes navigation way easier. I always know where to find objects, and rarely lose track of or misplace them.
Secondly, having multiple buckets usually makes my S3 paths shorter. This doesn’t sound like much of a benefit upfront, but the S3 path textboxes in the AWS console are quite small, and using long S3 paths in the command line can be a pain.
Finally, I find security and access controls are far simpler to implement with a multi-bucket setup. Personally I prefer “You can’t come into this house/bucket” over “You can come into this house/bucket, but you can’t go into this room/prefix”. However, both S3 buckets and S3 prefixes can be used as IAM policy resources so there’s technically no difference.
That concludes the S3 section. Next, let’s set up Athena.
Amazon Athena
In this section, I’ll get Athena ready for use. I’ll show the process I followed and explain my key decisions. Let’s start with my reasons for choosing Athena.
Why Athena?
Plenty has been written about Athena’s benefits over the years. So instead of retreading old ground, I’ll discuss what makes Athena a good choice for this particular use case.
Firstly, Athena is cheap. The serverless nature of Athena means I only pay for what I query, scan and store, and I’ve yet to see a charge for Athena in the three years I’ve been an AWS customer.
Secondly, like S3, Athena’s security is managed by IAM. I can use IAM policies to control who and what can access my Athena data, and can monitor that access in CloudTrail. This also means I can manage access to Athena independently of S3.
Finally, Athena is highly available. Authorised calls to the service have a 99.9% Monthly Uptime Percentage SLA and Athena benefits from S3’s availability and durability. This allows 24/7 access to Athena data for users and applications.
Setting Up Athena
To start this section, I recommend reading the AWS Athena Getting Started documentation for a great Athena introduction. I’ll cover some basics here, but I can’t improve on the AWS documentation.
Athena needs three things to get off the ground:
- An S3 path for Athena query results.
- A database for Athena tables.
- A table for interacting with S3 data objects.
I’ve already talked about the S3 path, so let’s move on to the database. A database in Athena is a logical grouping for the tables created in it. Here, I create a blog_amazonwebshark database using the following script:
CREATE DATABASE blog_amazonwebshark
Next, I enter the column names from my iTunes Export CSV into Athena’s Create Table form, along with appropriate data types for each column. In response, the form creates this Athena table:
The form adds several table properties to the table’s DDL. These, along with the data types, are expanded on in the Athena Create Table documentation.
Please note that I have removed the S3 path from the LOCATION property to protect my data. The actual Athena table is pointing at an S3 prefix in my ingested objects bucket that will receive my transformed iTunes data.
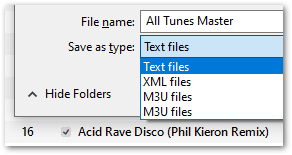
Speaking of data, the form offers several choices of source data format including CSV, JSON and Parquet. I chose Parquet, but why do this when I’m already getting a CSV? Why create extra work?
Let me explain.
About Parquet
Apache Parquet is a file format that supports fast processing for complex data. It can essentially be seen as the next generation of CSV. Both formats have their place, but at scale CSV files have large file sizes and slow performance.
In contrast, Parquet files have built-in compression and indexing for rapid data location and retrieval. In addition, the data in Parquet files is organized by column, resulting in smaller sizes and faster queries.
This also results in Athena cost savings as Athena only needs to read the columns relevant to the queries being run. If the same data was in a CSV, Athena would have to read the entire CSV whether the data is needed or not.
For further reading, Databricks have a great Parquet section in their glossary.
That’s everything for Athena. Now I need to update my Python scripts.
Python
In this section, I’ll make changes to my Basic iTunes ETL to include my new S3 and Athena resources and to replace the CSV output with a Parquet file. Let’s start with some variables.
New Python Variables
My first update is a change to ETL_ITU_Play_Variables.py, which contains my global variables. Originally there were two S3 global variables – S3_BUCKET containing the bucket name and S3_PREFIX containing the S3 prefix path leading to the raw data:
S3_BUCKET
S3_PREFIX
Now I have two buckets and two prefixes, so it makes sense to update the variable names. I now have two additional global variables, adding _RAW to the originals and _INGESTED to the new ones for clarity:
S3_BUCKET_RAW
S3_PREFIX_RAW

S3_BUCKET_INGESTED
S3_PREFIX_INGESTED
Changing CSV To Parquet
The next change is to ETL_ITU_Play.py. The initial version converts a Pandas DataFrame to CSV using pandas.DataFrame.to_csv. I’m now replacing this with awswrangler.s3.to_parquet, which needs three parameters:
dfis my existing Pandas DataFrame.boto3_sessionis the authentication session being used byawswrangler.s3.read_csv.pathis the full path for my_INGESTED
Put together, it looks like this:
wr.s3.to_parquet(
    df = df,
    boto3_session = session,
    path = s3_path_ingested
Before committing my changes, I took the time to put the main workings of my ETL in a class. This provides a clean structure for my Python script and will make it easier to reuse in future projects.
That completes the changes. Let’s review what has been created.
Architecture
Here is an architectural diagram of how everything fits together:
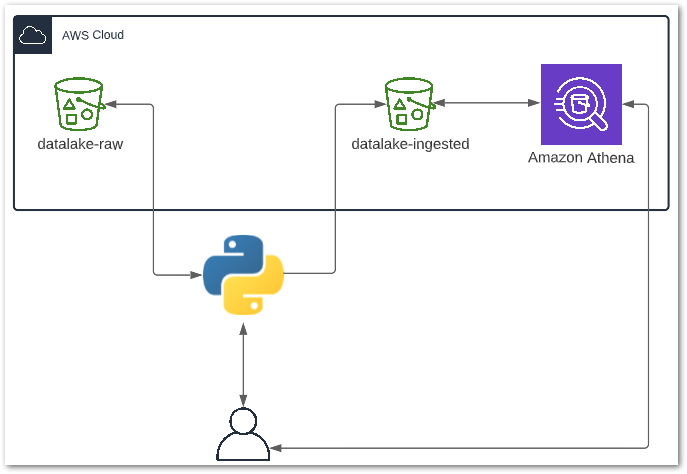
Here is a breakdown of the processes involved:
- User runs the Python ETL script locally.
- Python reads the CSV object in
datalake-rawS3 bucket. - Python extracts data from CSV into a DataFrame and transforms several columns.
- Python writes the DataFrame to
datalake-ingestedS3 bucket as a Parquet file. - Python notifies User of a successful run.
- User sends query to Athena.
- Athena reads data from
datalake-ingestedS3 bucket. - Athena returns query results to User.
Testing
In this section, I will test my resources to make sure they work as expected. Bare in mind that this setup hasn’t been designed with production use in mind, so my testing is somewhat limited and would be insufficient for production deployment.
Testing Python
TEST: Upload a CSV to the datalake-raw S3 bucket, then run the Python script. The Python script must run successfully and print updates in the terminal throughout.
RESULT: I upload an iTunes Export CSV to the datalake-raw S3 bucket:
The Python script runs, printing the following output in the terminal:
Creating DataFrame.
DataFrame columns are Index(['Name', 'Artist', 'Album', 'Genre', 'Time', 'Track Number', 'Year', 'Date Modified', 'Date Added', 'Bit Rate', 'Plays', 'Last Played', 'Skips', 'Last Skipped', 'My Rating', 'Location'], dtype='object')
Deleting unnecessary DataFrame columns.
Renaming DataFrame columns.
Reformatting DateTime DataFrame columns.
Creating Date Columns From DateTime Columns.
Creating MyRatingDigit Column.
Replacing blank values to prevent IntCastingNaN errors.
Setting Data Types.
Creating Parquet file from DataFrame.
Processes complete.
Testing S3
TEST: After the Python script successfully runs, the datalake-ingested S3 bucket must contain an itunesdata.parquet object.
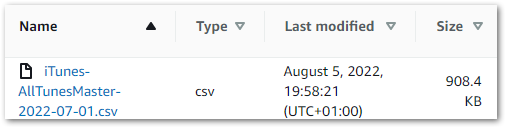
RESULT: Upon accessing the datalake-ingested S3 bucket, an itunesdata.parquet object is found:

(On an unrelated note, look at the size difference between the Parquet and CSV files!)
Testing Athena
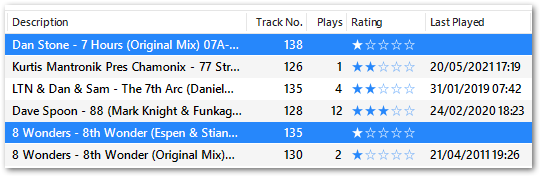
TEST: When the datalake-ingested S3 bucket contains an itunesdata.parquet object, data from the iTunes Export CSV must be shown when the following Athena query is run:
SELECT * FROM basic_itunes_python_etl;RESULT: Most of the Athena results match the iTunes Export data. However, the transformed dates did not match expectations:
This appears to be a formatting problem, as some parts of a date format are still visible.
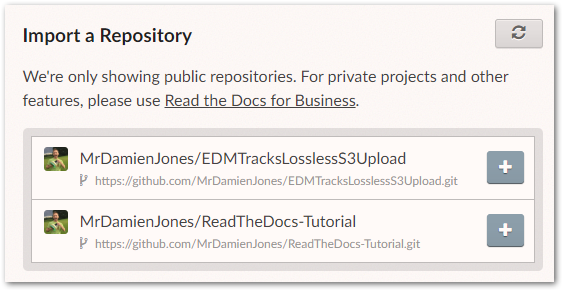
To diagnose the problem I wanted to see how these columns were being stored in the Parquet file. I used mukunku’s ParquetViewer for this, which is described in the GitHub repo as:
…a quick and dirty utility that I created to easily view Apache Parquet files on Windows desktop machines.
It works very well!
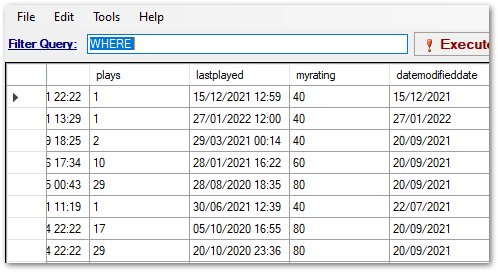
Here is a screenshot of the data. The lastplayed column has dates and times, while the datamodifieddate column has dates only:
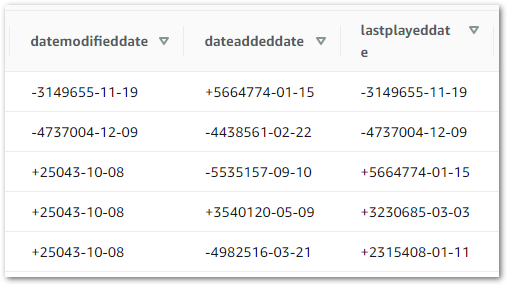
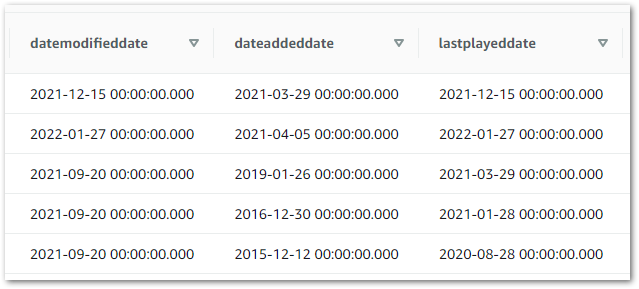
The cause of the problem becomes apparent when the date columns are viewed using the ISO 8601 format:
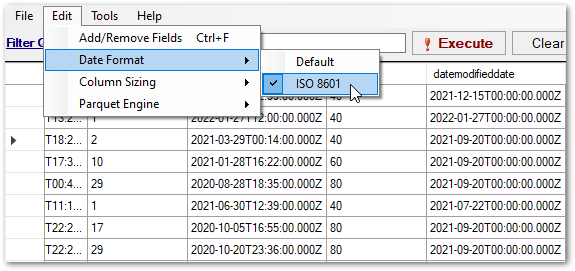
The date columns are all using timestamps, even when no times are included!
A potential fix would be to change the section of my Python ETL script that handles data types. Instead, I update the data types used in my Athena table from date:
  `datemodifieddate` date,
  `dateaddeddate` date,
  `lastplayeddate` date,
To timestamp:
  `datemodifieddate` timestamp,
  `dateaddeddate` timestamp,
  `lastplayeddate` timestamp,
This time, when I view my Athena table the values all appear as expected:
Scripts
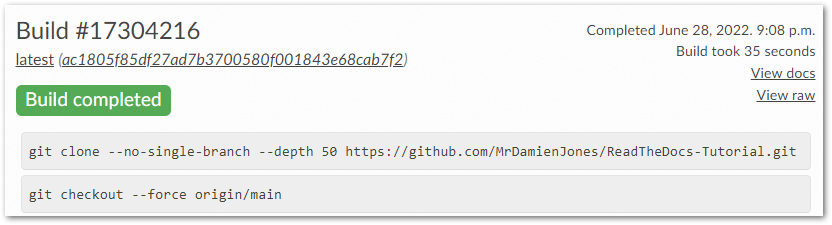
My ETL_ITU_Play.py file commit from 2022-08-08 can be viewed here:

My updated repo readme can be viewed here:
Summary
In this post, I updated my existing iTunes Python ETL to return a Parquet file, which I then uploaded S3 and viewed using Athena. I explained my reasoning for choosing S3, Athena and the Parquet file format, and I handled a data formatting issue.
If this post has been useful, please feel free to follow me on the following platforms for future updates:
Thanks for reading ~~^~~