In this post, I examine the process of migrating amazonwebshark to SiteGround and give an overview of the processes involved.
Table of Contents
- Introduction
- Hosting Alternatives
- Migrate What Exactly?
- Data Migration
- DNS Migration
- Any Problems?
- Future Plans
- Summary
Introduction
When I started amazonwebshark I had to make some infrastructure decisions. I registered the domain name with Amazon Route 53, and then needed to choose a blog hosting platform.
In December 2021 I took advantage of a Bluehost offer and paid £31.90 for their Basic WordPress Hosting package. This included a variety of services including:
- Provisioned server space for site resources.
- Managed and automated WordPress & MySQL installations.
- Web services like free SSL certificates and CDN caching.
My Bluehost renewal came through earlier this month, priced at £107.76. I’ve had great service from Bluehost and have no complaints, but that price was quite a leap. So, before I accepted it, I decided to do some research and see what my alternatives were.
Hosting Alternatives
In this section, I go through the results of my research into alternative hosting platforms.
Amazon Lightsail
I started by looking at Amazon Lightsail. Essentially, Lightsail is a simplified way of deploying AWS services like EC2, EBS and Elastic Load Balancing.
Lightsail pricing differs from most AWS services. Instead of the common Pay-As-You-Go pricing model, Lightsail has set monthly pricing. For example, a Linux server with similar memory, processing and storage to my Bluehost server currently costs $3.50 a month.
There is an important difference though. While Bluehost has teams of people responsible for tasks like server maintenance, database recovery, hard disk failures and security patches, with Lightsail the infrastructure would become my responsibility. I would save money over Bluehost, but at the cost of doing my own systems admin.
And the above list isn’t even exhaustive! It doesn’t include the setup and maintenance of services like CDN, SSL certificates and email accounts, all of which come with their own extra requirements and costs.
At this point, Bluehost was still on top.
SiteGround
SiteGround is in the same business as Bluehost. It offers a variety of hosting solutions for an array of use cases and has good standing in the industry.
SiteGround also had a great Black Friday offer this year! It was offering pretty much the same deal as Bluehost at £1.99 a month:

This is INSANELY cheap, especially considering how much all this infrastructure costs to run!
SiteGround has also developed a free WordPress plugin to automate migrations from other hosting platforms. While this isn’t unique to them, a combination of good reviews, extensive services, low hassle and a great price was more than enough to get me on board.
Migrate What Exactly?
Before continuing, I thought it best to go into a bit of detail about what exactly is being migrated. I’ve mentioned servers, databases and domains, but what gets moved where? And why?
Well, because I’m moving things around on the Internet, I need to talk about the Domain Name System (DNS).
Wait! Come back!
Explain DNS Like I’m 5
What follows is a very simple introduction to DNS. There’s far more to DNS than this, but that’s beyond the scope of this post.
Let’s say I want to phone The Shark Trust. I can’t type “The Shark Trust” into my handset – I need their phone number. So I open my phone book, turn to the S section and find The Shark Trust. Next to this entry is a phone number: 01752 672008. I type that number into the handset and get through to their office.
DNS is like the Internet’s phone book. Websites are held on servers, and the ‘phone numbers’ for those servers are IP addresses. When I request a website like amazonwebshark.com, my web browser needs to know the IP address for the server holding the site’s data, for example 34.91.95.18.
Explain DNS With Pictures
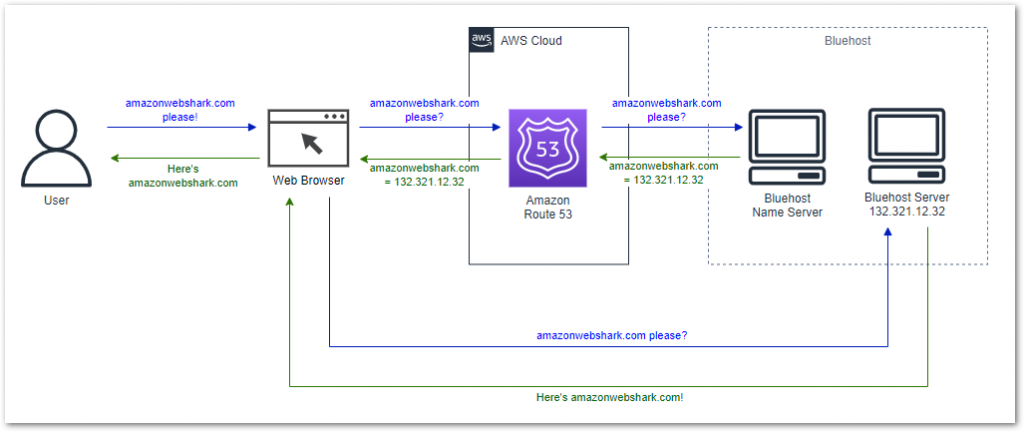
This WebDeasy diagram show DNS at a high level:

When a URL is entered into a web browser, a query is sent to a DNS server. Using the phone book analogy, the web browser is asking the DNS server for the amazonwebshark.com phone number.
DNS servers don’t have any IP addresses, but they know which ‘phone book’ to look in. These ‘phone books’ are called name servers. The DNS server finds and contacts the right name server, which matches the amazonwebshark.com domain name to an IP address.
The DNS server then returns this IP address to the web browser, which uses it to contact the server hosting the amazonwebshark.com resources.
In the diagram, the DNS-Server represents Route 53. Route 53 holds DNS records for the amazonwebshark.com domain name, and knows where to find the name servers that have the amazonwebshark.com IP address.
The webdeasy.de server represents the Bluehost name servers. These servers can answer a variety of DNS queries, and are considered the ground truth for initial site visits and browser caching.
amazonwebshark’s DNS Setup
At the start of December 2022 the amazonwebshark.com domain name was hosted by Route 53, with an NS record pointing at the Bluehost name servers:

The basic infrastructure looked like this, with outbound requests in blue and inbound responses in green:
And that’s it! To further explore DNS core concepts, this DNSimple comic is well worth a read and this Fireship video gives a solid, if a little more technical, account:
Data Migration
In this section, I start migrating my amazonwebshark data from Bluehost to SiteGround.
SiteGround has an automated migrator plugin that copies existing WordPress sites from other hosting platforms. And it’s very good! The process boils down to:
- Create an empty SiteGround website.
- Generate a migration token in SiteGround Site Tools.
- Install the SiteGround migrator plugin.
- Paste the migration token in the plugin to start the migration.
The process can also be seen in this Avada video:
The plugin copies all the amazonwebshark server files, scripts and database objects in a process that takes about five minutes. SiteGround then provides a temporary URL for testing and performance checks:
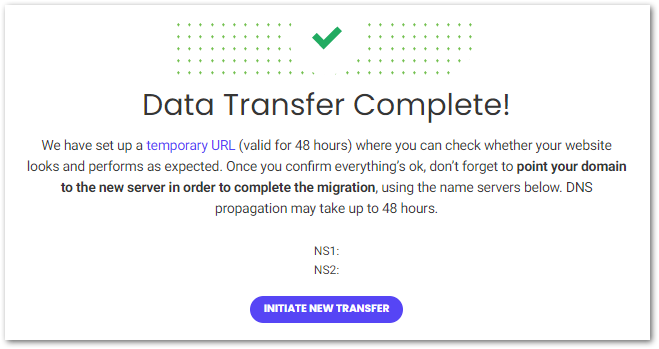
After completely migrating amazonwebshark to SiteGround, the next step involves telling the amazonwebshark domain where to find the new server. Time for some DNS!
DNS Migration
In this section, I update the amazonwebshark DNS records with the SiteGround name servers.
I repointed the existing amazonwebshark NS record from Bluehost to SiteGround by updating the values in Route 53 from this:
To this:

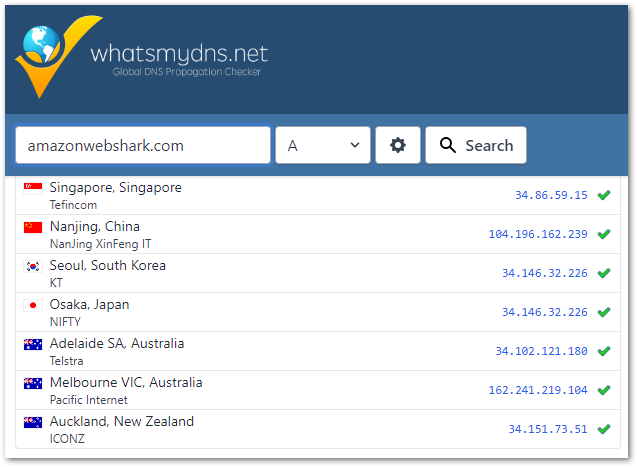
My change then needed to propagate through the Internet. Internet Service Providers update their records at different rates, so changes can take up to 72 hours to complete worldwide.
Free DNS checking tools like WhatIsMyDNS can perform global checks on a domain name’s IP address and DNS record information. The check below was done after around 30 hours, by which time most of the servers were returning SiteGround IPs:
Any Problems?
First, the good news. There was no downtime while migrating amazonwebshark to SiteGround! During the migration, DNS queries were resolved by either Bluehost’s or SiteGround’s name servers. Both platforms had amazonwebshark data, so both could answer DNS queries.
Additionally, as I set a change freeze on amazonwebshark until the migration was over, there was no lost or orphaned content.
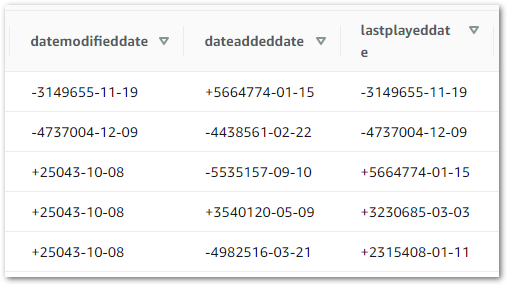
I did lose some WPStatistics hit statistics data though. There is no data for December 03 and December 04:

This was my fault. The DNS propagation took longer than it should have because of a misunderstanding on my part!
So why was data lost? WPStatistics stores data in tables in the site’s MySQL database. When I first migrated my data on December 02, the Bluehost and SiteGround tables were the same. After that point, Bluehost continued to serve amazonwebshark until December 05, and wrote its statistics in the Bluehost MySQL tables.
It was only after I corrected my DNS mistake that SiteGround could start serving content and writing statistics on the SiteGround MySQL tables. So SiteGround didn’t record anything for December 03 and December 04, and as no additional data migration was done the statistics that Bluehost recorded never made it to the SiteGround tables.
I can recover this if I want to though. I took a full backup of my Bluehost data before ending the contract. That included a full backup of the Bluehost MySQL database with the WPStatistics tables. I’ll take a look at the tables at some point, see how the data is arranged and decide from there.
Future Plans
I’m considering moving amazonwebshark to a serverless architecture in 2023. While the migration was a success, servers still have inherent problems:
- Servers can break or go offline.
- They can be hacked.
- They can be over or under-provisioned.
Serverless infrastructure could remove those pain points. I don’t use any WordPress enterprise features, and amazonwebshark could exist very well as an event-driven static website. Tools like Hugo and Jekyll are designed for the job and documented well, and people like Kendra Little and Chrissy LeMaire have successfully transitioned their blogs to serverless infrastructures.
The biggest challenge here isn’t architectural. If I moved to a serverless architecture, I would want something similar to the Yoast SEO analysis plugin. This plugin has really helped me improve my posts, and by extension has made them more enjoyable to write.
I’ve seen lots of serverless tooling for migrating resources and serving content, but not so much for SEO guidance and proofreading. Any amazonwebshark serverless migration would be contingent on finding something decent along these lines. After all, if the blog becomes a pain to write for then what’s the point?
Summary
In this post, I examined the process of migrating amazonwebshark to SiteGround and gave an overview of the processes involved.
I’m very happy with how things went overall! The heavy lifting was done for me, both companies were open and professional throughout and what could have been a daunting process was made very simple!
If this post has been useful, please feel free to follow me on the following platforms for future updates:
Thanks for reading ~~^~~