Categories
Training & Community

AWS Summit London 2022 Takeaways

In this post, I will talk about my main takeaways from my visit to the AWS Summit London 2022 event.

Table of Contents

Introduction

Anyone following my Instagram will have seen that I attended the AWS Summit London 2022 event in April. This was my first AWS event, and I had a great time watching the presentations, taking in the atmosphere and finding things that a magnetic shark could stick to.

Besides stickers and badges, I left the event with pages of notes and photos of slides that fell roughly into two lists:

  • Consider for work
  • Consider for me

I’ve done the work list, so it’s time for mine! This post has two halves. Firstly, I’ll talk about some of the AWS services I want to try out on the blog over the next few months.

Then, in the second half, I’ll talk about some of the third party presentations that introduced me to interesting things that I hadn’t heard about before.

Let’s get started!

AWS Presentations

In this section, I’ll talk about some of the services mentioned in the AWS Summit London 2022 sessions that I want to try out over the next few months.

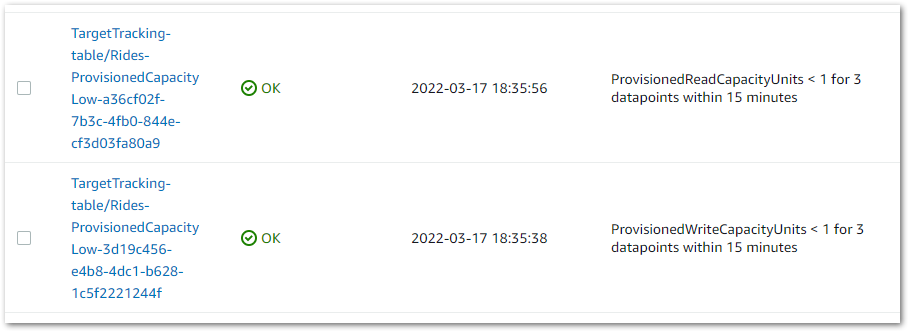
Amazon CloudWatch SDK For Python

Having seen the CloudWatch SDK in passing while studying for my Certified Developer Associate certification, I saw a demo of it in one of the sessions.

I was impressed with how quick and simple the SDK is to use, and have a few ideas for it as part of some Python ETLs and IoT functions I want to try. In addition, I can create and then re-use common monitoring modules to save myself some time in future.

Amazon Timestream

From the Amazon Timestream website:

Amazon Timestream is a fast, scalable, and serverless time series database service for IoT and operational applications that makes it easy to store and analyze trillions of events per day up to 1,000 times faster and at as little as 1/10th the cost of relational databases.

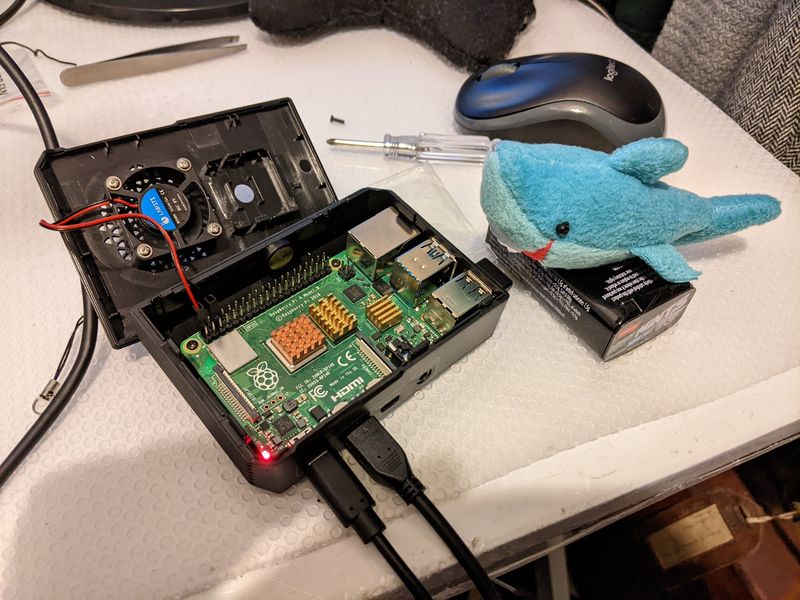
Some time soon I’m hoping to try out a Raspberry Pi project that uses a temperature sensor. Timestream looks like a good fit for this! It’s built with IoT in mind, is serverless and offers built-in analytics. In addition, it offers integrations with Amazon Kinesis and Grafana, so it sounds simple to get off the ground.

AWS Data Exchange

From the AWS Data Exchange website:

AWS Data Exchange makes it easy to find, subscribe to, and use third-party data in the cloud.

After you’ve subscribed to a data product, you can use the AWS Data Exchange API to load data directly into Amazon Simple Storage Service (S3) and use a range of AWS analytics and machine learning (ML) services to analyze it.

One of the challenges of trying out services aimed at big data is a lack of big data.

Sample databases like Northwind, AdventureWorks and WideWorldImporters have been around for a while, helping generations of people learn their craft. However, Northwind was intended for SQL Server 2000. And although WideWorldImporters is more recent it’s a bit limited by modern standards.

AWS Data Exchange offers a variety of modern Data Products via the AWS Marketplace. Currently, there are over 3500 Data Products and almost half of them cost nothing to access. So lots to use for potential EMR, Glue and SageMaker projects!

AWS DataOps Development Kit (DDK)

From the AWS DataOps Development Kit repo:

The AWS DataOps Development Kit is an open source development framework for customers that build data workflows and modern data architecture on AWS. Based on the AWS CDK, it offers high-level abstractions allowing you to build pipelines that manage data flows on AWS, driven by DevOps best practices.

The DDK joins the CDK as something I want to try out. I’ve not done anything with infrastructure as code on the blog yet. However, the CDK sounds like a good place to start, and the DDK could quickly spin me up some infrastructure to use with some Data Exchange data.

AWS One Observability Workshop

From the One Observability Workshop Studio:

You will learn about AWS observability functionalities on Amazon CloudWatch, AWS X-Ray, Amazon Managed Service for Prometheus, Amazon Managed Grafana and AWS Distro for OpenTelemetry (ADOT). The workshop will deploy a micro-service application and help you learn monitoring.

I’ve already made some bespoke monitoring for my main AWS account. I’m interested in trying this workshop out to see what else I can learn. I’m also keen on getting some first-hand experience with X-Ray, Prometheus and Grafana.

Third-Party Presentations

In this section, I’ll talk about some of the third party presentations that introduced me to interesting things that I hadn’t heard about before.

Cazoo’s Serverless Architecture

Cazoo‘s Engineering Coach Bob Gregory spoke about their use of AWS serverless technologies including Lambda, DynamoDB and Athena. As a result, Cazoo was the first to market and could scale quickly in response to rapid customer demand.

This was my first time hearing about Cazoo, and Bob turned a very business-oriented presentation into a chat with some mates at the pub. He has a great speaking style, an example of which is here:

Amazon published a press release about Cazoo on the day of the Summit. It details Cazoo’s current and future relationship with AWS and includes Cazoo’s plans to integrate various AWS machine learning tools. Examples include Textract for paperwork processing and invoice management and Rekognition for inventory handling and rapid image and video analytics.

And speaking of analytics…

EMIS Group’s Data Architecture

EMIS Group‘s CTO Richard Jarvis spoke about how they use various AWS services to ingest, analyse and present health care data. During the 2020 Pandemic, they were able to quickly analyse national COVID-19 data and provide clinical research about topics including transmission, treatment and vaccination.

EMIS Group’s data security includes a Data Mesh architecture, which separates data producers from data consumers. Meanwhile, AWS IAM handles the security of their applications by controlling how users access them and how they interact with each other.

As a result, EMIS Group can ensure that the right applications are accessible by the right people, and that sensitive and personal data is stored appropriately and in line with GDPR.

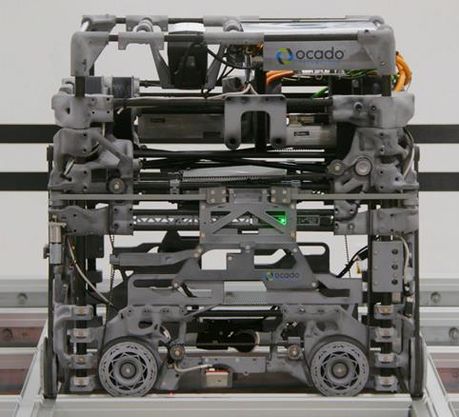
Ocado’s Fulfilment Robots

Ocado‘s Chief Technology Officer James Donkin and Chief of Advanced Technology Alex Harvey spoke about the use of AWS at their fulfilment centres. Ocado has made a name for itself in the field of robotics and has used this technology to drive efficiency and innovation.

That video is from 2018 and a lot has changed since then. This year Ocado have begun upgrading to their new 600 Series fulfilment robot, pictured here:

Wait. That’s a Borg Cube. Hold on.

YOU WILL BE REFRIGERATED

Alex and James talked about the challenges of operating thousands of robots, and how AWS help them innovate and scale while maintaining low latency and cost. Ocado deploys microservices and web applications to AWS, which the robots rely on for communication and navigation.

Further information is available on an Ocado case study on the AWS website.

Summary

In this post, I discussed the main takeaways from my recent visit to the AWS Summit London 2022 event. I talked about some of the services I want to try out on the blog over the next few months, as well as some of the third party presentations that introduced me to interesting things that I hadn’t heard about before.

In conclusion, I had a great time at the summit! I came away with a lot of good ideas and had some great conversations. Hopefully, I’ll be able to go back next year!

If this post has been useful, please feel free to follow me on the following platforms for future updates:

Thanks for reading ~~^~~

Categories
Security & Monitoring

Unexpected CloudWatch In The Billing Area

In this post I will investigate an unexpected CloudWatch charge on my April 2022 AWS bill, and explain how to interpret the bill and find the resources responsible.

Table of Contents

Introduction

My April 2022 AWS bill has arrived. The total wasn’t unusual – £4.16 is a pretty standard charge for me at the moment, most of which is S3. Then I took a closer look at the services and found an unexpected cost for CloudWatch, which is usually zero.

But not this month:

While $0.30 isn’t bank-breaking, it is unexpected and worth investigating. More importantly, nothing should be running in EU London! And there were no CloudWatch changes at all on my March 2022 bill. So what’s going on here?

Let’s start with the bill itself.

The April 2022 Bill

Looking at the bill, the rows with unexpected CloudWatch charges all mention alarms. Since nothing else has generated any charges, let’s take a closer look at all of the rows referring to alarms.

$0.00 Per Alarm Metric Month – First 10 Alarm Metrics – 10.000 Alarms

The AWS Always Free Tier includes ten CloudWatch alarms.

$0.10 Per Alarm Metric Month (Standard Resolution) – EU (Ireland) – 2.000002 Alarms

In EU Ireland, each standard resolution alarm after the first ten costs $0.10. The bill says there are twelve alarms in EU Ireland – ten of these are free and the other two cost $0.10 each – $0.20 in total.

$0.10 Per Alarm Metric Month (Standard Resolution) – EU (London) – 1.000001 Alarms

CloudWatch standard resolution alarms also cost $0.10 in EU London. As all my free alarms are seemingly in EU Ireland, the one in EU London costs a further $0.10.

So the bill is saying I have thirteen alarms – twelve in EU Ireland and one in EU London. Let’s open CloudWatch and see what’s going on there.

CloudWatch Alarm Dashboard

It seems I have thirteen CloudWatch alarms. Interesting, because I could only remember the four security alarms I set up in February.

CloudWatch says otherwise. This is my current EU Ireland CloudWatch dashboard:

Closer inspection finds eight alarms with names like:

  • TargetTracking-table/Rides-ProvisionedCapacityHigh-a53f2f67-9477-45a6-8197-788d2c7462b3
  • TargetTracking-table/Rides-ProvisionedCapacityLow-a36cf02f-7b3c-4fb0-844e-cf3d03fa80a9

Two of these are constantly In Alarm, and all have Last State Update values on 2022-03-17. The alarm names led me to suspect that DynamoDB was involved, and this was confirmed by viewing the Namespace and Metric Name values in the details of one of the alarms:

At this point I had an idea of what was going on. To be completely certain, I wanted to check my account history for 2022-03-17. That means a trip to CloudTrail!

CloudTrail Event History

CloudTrail’s Event History shows the last 90 days of management events. I entered a date range of 2022-03-17 00:00 > 2022-03-18 00:01 into the search filter, and it didn’t take long to start seeing some familiar-looking Resource Names:

Alongside the TargetTracking-table resource names linked to monitoring.amazonaws.com, there are also rows on the same day for other Event Sources including:

  • dynamodb.amazonaws.com
  • apigateway.amazonaws.com
  • lambda.amazonaws.com
  • cognito-idp.amazonaws.com

I now know with absolute certainty where the unexpected CloudWatch alarms came from. Let me explain.

Charge Explanations

So far I’ve reviewed my bills, found the CloudWatch alarms and established what was happening in my account when they were added. Now I’ll explain how this all led to charges on my bill.

The $0.20 EU Ireland Charge

When I was recently studying for the Developer Associate certification, I followed an AWS tutorial on how to Build a Serverless Web Application with AWS Lambda, Amazon API Gateway, AWS Amplify, Amazon DynamoDB, and Amazon Cognito. This was to top up my serverless knowledge before the exam.

The third module involves creating a DynamoDB table for the application. A table that I provisioned with auto-scaling for read and write capacity:

These auto-scaling policies rely on CloudWatch alarms to function, as demonstrated by some of the alarm conditions:

The DynamoDB auto-scaling created eight CloudWatch alarms. Four for Read Capacity Units:

  • ConsumedReadCapacityUnits > 42 for 2 datapoints within 2 minutes
  • ConsumedReadCapacityUnits < 30 for 15 datapoints within 15 minutes
  • ProvisionedReadCapacityUnits > 1 for 3 datapoints within 15 minutes
  • ProvisionedReadCapacityUnits < 1 for 3 datapoints within 15 minutes

And four for Write Capacity Units:

  • ConsumedWriteCapacityUnits > 42 for 2 datapoints within 2 minutes
  • ConsumedWriteCapacityUnits < 30 for 15 datapoints within 15 minutes
  • ProvisionedWriteCapacityUnits > 1 for 3 datapoints within 15 minutes
  • ProvisionedWriteCapacityUnits < 1 for 3 datapoints within 15 minutes

These eight alarms joined the existing four. The first ten were free, leaving two accruing charges.

This also explains why two alarms are always In Alarm – the criteria for scaling in are being met but the DynamoDB table can’t scale down any further.

I could have avoided this situation by destroying the resources after finishing the tutorial. The final module of the tutorial covers this. Instead I decided to keep everything around so I could take a proper look at everything under the hood.

No resources accrued any charges in March, so I left everything in place during April. I’ll go into why there was nothing on the March bill shortly, but first…

The $0.10 EU London Charge

Remember when I said that I shouldn’t be running anything in EU London? Turns out I was!

I found a very old CloudWatch alarm from 2020. It’s been there ever since. Never alerting so I didn’t know it was there. Included in the Always Free tier, so never costing me anything or triggering an AWS Budget alert. Appearing on my bill, but always as a free entry so never drawing attention.

When I exceeded my ten free CloudWatch alarms, the one in EU London became chargeable for the first time. A swift delete later and that particular problem is no more.

No CloudWatch Charge On The March 2022 Bill

That only leaves the question of why there were no CloudWatch charges on my March 2022 bill, despite there being thirteen alarms on my account for almost half of that month:

I wanted to understand what was going on, so I reached out to AWS Support.

In what must have been a first for them, I asked why no money had been billed for CloudWatch in March:

On my April 2022 bill I was charged $0.30 for CloudWatch. $0.20 in Ireland and $0.10 in London. I understand why.

What I want to understand is why I didn’t see a charge for them on my March 2022 bill. The alerts were added to the account on March 17th, so from that moment on I had thirteen alerts which is three over the free tier.

Can I get confirmation on why they don’t appear on March but do on April please?

I soon received a reply from AWS Support that explained the events in full:

…although you enabled all 13 Alarms in March, the system only calculated a pro-rated usage value, since the Alarms were only enabled on 17th March. The pro-rated Alarm usage values only amounted to 7.673 Alarms in the EU (Ireland) region, and 1.000003 Alarms in the EU (London) region.

The total pro-rated Alarm usage calculated for March (8.673003 Alarms) is thus within the 10 Alarm Free Tier threshold and thus incurred no charges, whereas in April the full 13 Alarm usage came into play for the entire month…

To summarise, I hadn’t been charged for the alarms in March because they’d only been on my account for almost half a month. Thanks for the help folks!

Summary

In this post I investigated an unexpected CloudWatch charge on my April 2022 AWS bill. I showed what the bill looked like, demonstrated how to find the resources generating the charges and explained how those resources came to be on my AWS account.

If this post has been useful, please feel free to follow me on the following platforms for future updates:

Thanks for reading ~~^~~

Categories
Internet Of Things & Robotics

Getting Started With My Raspberry Pi 4 And AWS IoT

In this post I unbox and configure my new Raspberry Pi 4, and then register it with my AWS account as an AWS IoT device.

Table of Contents

Introduction

After earning my AWS Certified Developer – Associate certification last month, my attention turned to the Raspberry Pi my partner got me as a birthday present. I’ve had it for a while and done nothing with it because of a lack of time and ideas. I promised myself that I’d open it up after finishing my exam, so let’s go!

What’s In The Box?

My birthday gift came in the form of the Labists Raspberry Pi 4 4GB Complete Starter Kit. Having seen the price, I must have been good that year!

The set includes:

  • Raspberry Pi 4 Model B 4GB RAM with 1.5GHz 64-bit Quad-core CPU
  • 32GB Class 10 MicroSD Card Preloaded with NOOBS
  • Premium Black Case (High Gloss) for Pi 4B
  • Mini Silent Fan
  • Two Micro HDMI to HDMI Cables

Labists have a great video for assembling the Raspberry Pi. Fiddling with exposed circuitry is anxiety-inducing for a heavy-handed data professional like myself, so the video was very welcome!

The steps basically boil down to:

  • Attach Heat Sinks To Pi
  • Screw Fan To Case
  • Screw Pi To Case
  • Connect Fan Pins To Pi
  • Close Case

My Raspberry Pi is now out of the box and fully assembled, so let’s get some advice on how it works.

Getting To Know My Pi With FutureLearn

FutureLearn is a global learning platform with a mission to transform access to education by offering online courses from the world’s leading universities and brands. They offer a range of all-online, on-demand courses and offer free and paid content.

The Educators

The Getting Started with Your Raspberry Pi course is one of a number of free courses by the Raspberry Pi Foundation. The Foundation is a UK charity seeking to increase the availability of computing and digital making skills by providing low-cost, high-performance single-board computers, highly available training and free software.

The Course

The course is split into three weeks, although the lessons can be completed at the pace of the user. The first week of the course “Setting Up Your Raspberry Pi” introduces the facilitation team, walks through the hardware and software and gives a basic introduction to Raspberry Pi OS.

Week Two “Using Your Raspberry Pi” offers insight into what the Raspberry Pi can do. This includes the compute resources, the ability to connect peripherals and the built-in software such as the visual programming language Scratch and the introductory Python editor Thonny.

Finally, Week Three “Taking More Control Of Your Raspberry Pi” goes full SysAdmin and introduces security measures, the command line and remote access. Instructions are given on how to control the Pi via VNC Viewer and SSH, and commands like mkdir, cp and mv are covered.

Most significantly, the APT Package Manager is introduced along with commands including:

  • sudo apt update
  • apt list --upgradable
  • sudo apt autoclean.

A beginners course that introduces the ideas of keeping devices updated, tidy and secure is a welcome sight as it encourages good user behaviour early on and ultimately prolongs the life of the Raspberry Pi.

My Raspberry Pi is now accessible, updated and ready to take on jobs, so let’s give it something to do!

Connecting My Pi To AWS

AWS offer several IoT services that are summarised as Device Software, Control Services and Analytics. To simplify the process of connecting a new IoT device, AWS has added a wizard to the Build A Solution widget on the newest version of the AWS Management Console:

This loads the AWS IoT wizard used by AWS IoT Core, consisting of a three-step process:

A word of advice – check the region the wizard is running in! I mainly use eu-west-1 but the IoT wizard changed this to us-west-2 and would have created my resources in the wrong place!

Before starting, AWS need to know which operating system my IoT device uses and which SDK I want to use. I tell AWS that my Raspberry Pi is running Linux and that I intend to use the Python SDK, and in response AWS offers some advice before starting the wizard:

Some prerequisites to consider: the device should have Python and Git installed and a TCP connection to the public internet on port 8883.

This has already been taken care of so let’s continue.

AWS IoT Configuration

Step 1 involves creating an IoT Thing with a matching Thing Record. A Thing Record is how AWS represents and records a physical device in the cloud, and is used for recording properties of the IoT Thing including certificates, jobs and the ARN.

I name my Raspberry Pi dj-raspberrypi4-labists. AWS then attach a Device Shadow to the Thing Record. These make a device’s state available to apps and other services. whether the device is connected to AWS IoT or not. For example, my Pi’s state could be Online or Offline.

In Step 2 AWS confirm that a new thing was created. A new AWS IoT Core policy is also created to enable sending and receiving messages. AWS IoT Core policies are basically IAM for AWS IoT devices. They control access to operations including:

AWS also supply a downloadable connection kit. This contains certificates and keys for authentication and an SSH script for device configuration and message processing. This is provided as a ZIP archive, which I put on my Raspberry Pi in a new folder specifically for AWS objects.

Device Configuration

Finally, the wizard gives a list of commands to send to the IoT device to test the AWS connection. The first command unzips the connection kit:

unzip connect_device_package.zip

The second command adds execution permissions to the start.sh script in the connection kit:

chmod +x start.sh

I’m never keen on running unfamiliar code off the Internet without knowing what it does first, so I did some searching – it turns out that chmod +x makes a file executable.

Now start.sh is runnable, it can be executed using the command ./start.sh. This is a short script that performs the following actions:

The result is an infinite stream of Hello Worlds:

Finally, AWS give a summary of the steps completed:

Cost Analysis

AWS IoT Core hasn’t cost me any money so far. This might be because I’m only running test loads on it currently, but looking at the new lines on my bill it’s going to be a while before I start making AWS any money here:

Next Steps

Having set up my Raspberry Pi, I have found some upgrades that I need to take care of:

Operating System Upgrade

Firstly, my Raspberry Pi’s operating system has an update available. It is currently running Rasbian 10, known as Buster:

In November 2021 Raspberry Pi released Bullseye. This is a major upgrade so the recommended process is to download a new image, reinstall any applications, and move data across from the current image. This makes sense to do while there isn’t much data on my Pi.

This leads me on to…

Raspberry Pi Imager

A common task with a Raspberry Pi is installing an operating system onto an SD card. In 2013 Raspberry Pi released NOOBS, or New Out Of the Box Software to give it its full name. Someone at Raspberry Pi HQ clearly has a sense of humour.

NOOBS was designed to simplify the process of setting up a new Pi for first time users, and the Labists kit included an SD card with NOOBS preinstalled. However Raspberry Pi no longer support it, and now recommend the Raspberry Pi Imager for installing Raspberry Pi OS instead.

So plenty to be getting on with!

Summary

In this post I’ve unboxed and configured my Raspberry Pi and linked it to my AWS account as an IoT Thing. I’ve described the basic concepts of AWS IoT Core and have identified some important upgrades that my Pi needs before I consider using it for anything serious.

If this post has been useful, please feel free to follow me on the following platforms for future updates:

Thanks for reading ~~^~~