In this post I will set up my new Raspberry Pi Zero, wire up a moisture sensor and use Python to convert the sensor data into email alerts.
Table of Contents
- Introduction
- Installing Raspberry Pi OS 11 On A MicroSD Card
- Setting Up The Moisture Sensor
- Testing The Sensor
- Retesting The Sensor
- Next Steps
- Summary
Introduction
I recently wrote about setting up my Raspberry Pi 4. This isn’t the only Pi I have in the house though, as I put a Raspberry Pi Zero on my Christmas wishlist at about the same time and it turns out Santa was taking notes. Glad I got it before the current supply issues!
This post will flow differently from the last one as the Raspberry Pi Zero didn’t come as a kit. This time my board came in a plastic sleeve inside an unbranded white box. It came with GPIO pins attached (so I don’t have to learn how to solder properly yet!), but it didn’t come with a MicroSD card containing the Raspberry Pi OS. So let’s start there!
Installing Raspberry Pi OS 11 On A MicroSD Card
Raspberry Pis have no hard drives. Instead, they rely on memory cards for their storage. These memory cards can run a wide range of operating systems, the main limitations being the processor’s power and the operating system’s security.
For example, Windows 10 could be loaded onto a memory card but a Raspberry Pi Zero would have no chance of running it well. On the other hand, a Raspberry Pi might be able to run Windows 95 but it’d be a security nightmare.
Most use cases for a Raspberry Pi lend themselves to Raspberry Pi OS (previously called Raspbian) – a Debian-based operating system that is optimized for most Raspberry Pi hardware. Here, I’ll be installing it using the Raspberry Pi Imager.
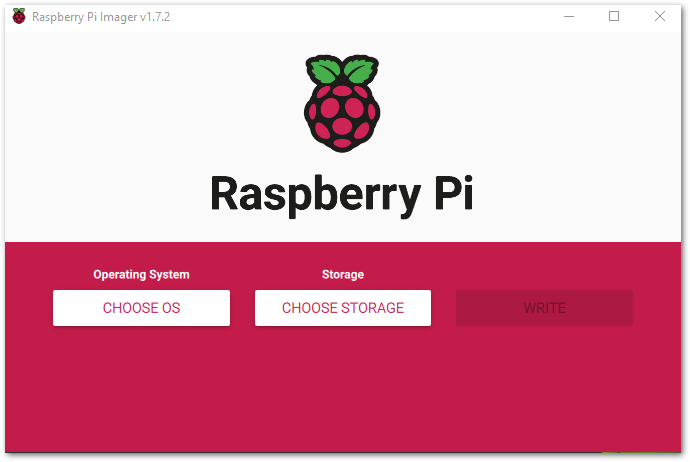
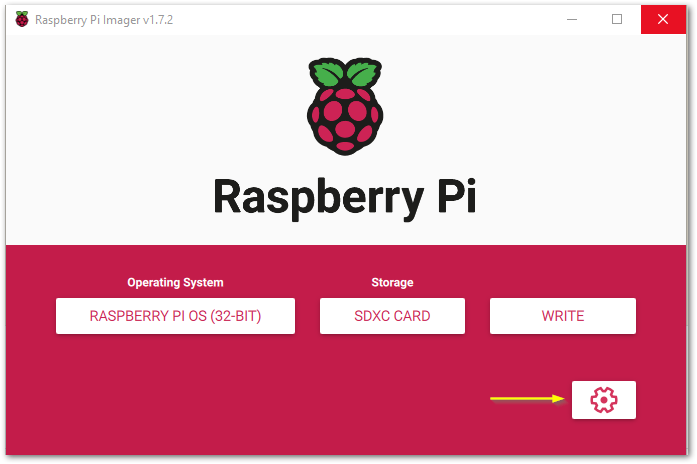
Raspberry Pi Imager: Main Options
In my last post I mentioned that I’d need to take a look at the Raspberry Pi Imager. This software installs Raspberry Pi OS on MicroSD cards and replaces NOOBS. Versions are available for Windows, Mac and Ubuntu.
Firstly I need to choose an Operating System. There are a lot of choices here! There are different versions of the Raspberry Pi OS depending on whether I want Buster or Bullseye, and whether I want a desktop environment or not. Alternatively, I can choose to install a non-Raspberry Pi OS such as Ubuntu or Manjaro Linux.
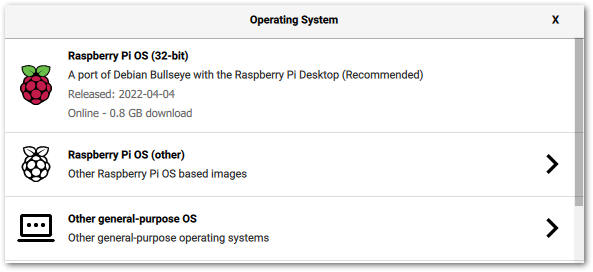
Here the recommended setup is fine.
Next I need to choose my storage. I got a good deal on a multipack of Sandisk 64GB MicroSD cards, and will use one of those instead of overwriting the MicroSD card that came with my Labists Raspberry Pi 4 4GB Complete Starter Kit.
Raspberry Pi Imager: Advanced Options
After selecting the main options I can then access some advanced options to further customise my Raspberry Pi OS installation.
These Advanced Options are as follows:
Set Hostname
The hostname of a Raspberry PI enables it to be addressed by a name as well as an IP address. It is how a Raspberry Pi identifies itself to other systems on a local network. By default, the hostname is set to raspberrypi, but as I have more than one Raspberry Pi I will change this to avoid confusion.
Arise, mako!
Enable SSH
This option is essentially the same as the one in the Raspberry Pi Configuration settings. Enabling this now will save me a job later on.
Set Username And Password
This is a recent addition. The default username and password for any new Pi are pi and raspberry respectively, but a default password carries obvious security problems if unchanged.
Knowing a username isn’t as risky, but leaving the default in place makes life easier for a potential hacker so changing it is in my best interests. And no – it’s not mako.
Configure Wireless LAN
This is a technical way of saying ‘Set Up Wifi’.
Set Locale Settings
This selects the timezone and keyboard layout. Both were already set to GB, so this might have used my laptop’s settings. No changes needed here.
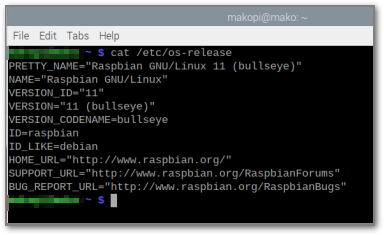
Writing To The MicroSD Card
Finally I started writing to the card. Seven minutes later I had a card which, upon insertion into my Raspberry Pi Zero and after a couple of minutes finding its feet, gave me a working installation of the latest version of Raspberry Pi OS 11 to play with!
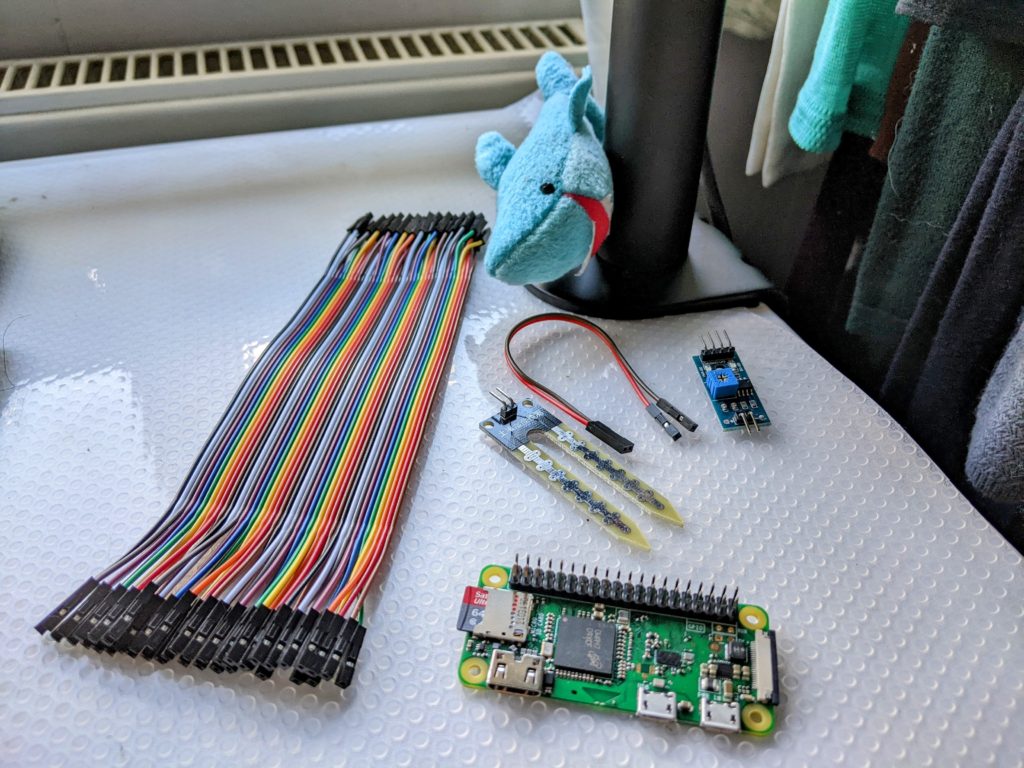
Setting Up The Moisture Sensor
Time for my Raspberry Pi Zero to get its first job! This comes in the form of the ModMyPi Soil Moisture Sensor Kit.

The moisture sensor board features both analogue and digital outputs. The digital output gives a On or Off signal when the soil moisture content is above a certain value. The value can be set or calibrated using the adjustable onboard potentiometer.
Let’s get building!
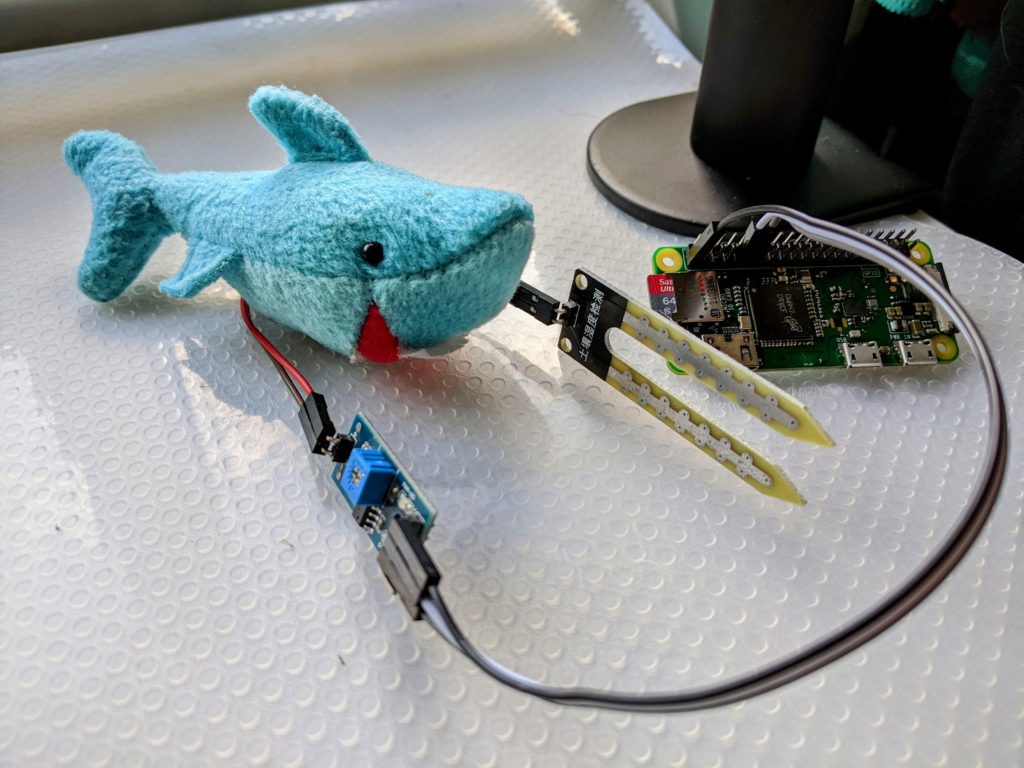
Wiring Up The Sensor
The sensor kit comes with a jumper wire for connecting the sensor spade to the comparator board. It doesn’t come with any wires to connect the board to the Raspberry Pi though! Some hastily ordered jumper wires later and I was back in business.
As a first-timer potentially talking to other first-timers, I will say that the process of connecting the jumper cables to the various pins is an anxious experience.
All my senses were telling me that the pins looked delicate, so I used minimal pressure with the jumper wires and wondered why they kept coming off. It turns out these pins were designed to cope with some abuse after all, so being heavy-handed is encouraged. Just give the wires a good push!
It is also important to connect the wires to the correct GPIO pins on the Raspberry Pi. I used the Pi4J Project’s GPIO diagram to make sure the correct wires were connected to the correct pins.
Checking The Python Script
ModMyPi offer a Python script for this sensor on their Github repo. Let’s run through it and see what it does.
Importing Libraries
The script uses three libraries, all of which are included by default with Raspberry Pi OS 11:
RPi.GPIO: for controlling the GPIO pins on the Raspberry Pi.smtplib: sends emails via SMTP.time: for a sleep function that is part of the script.
Sending Emails
A sendEmail function uses the smtplib library and a set of variables to send emails when the function is called. The script prints "Successfully sent email" for successes and "Error: unable to send email" for failures.
Monitoring GPIO Pin
A callback function uses the RPi.GPIO library and a pair of variables to monitor the GPIO pin that the sensor is connected to. When a change is registered, one of two emails is sent via the sendEmail function depending on whether the sensor’s output is On or Off.
To keep the script running, the time library is used to add a slight delay to an infinite loop. This stops all of the CPU being used by the script, which would leave none for Raspberry Pi OS.
Testing The Sensor
To check that the sensor readings were coming through correctly, I needed a way to make the sensor wet or dry quickly. Necessity is the mother of invention, so I came up with this:
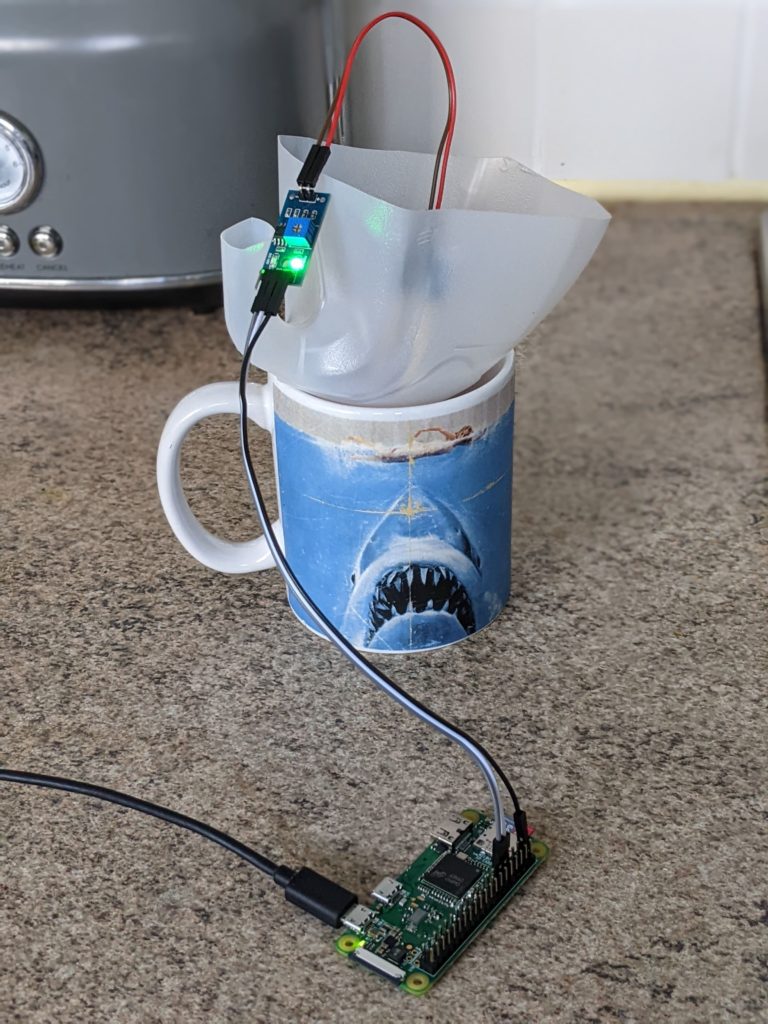
A sliced up milk bottle with a small hole in the lid and wires coming out of it. What a time to be alive.
My first attempts showed that the sensor was working (LED off and LED on) but the emails were failing:
Python 3.9.2 (/usr/bin/python3)
>>> %Run moisture.py
LED off
Error: unable to send email
LED on
Error: unable to send email
Troubleshooting: Statements Must Be Separated By Newlines Or Semicolons
An example of one of the uses of the print function in the script is:
print "LED off"Visual Studio Code flags this as a problem, stating that Statements must be separated by newlines or semicolons.
This is down to differences between Python 2 and Python 3. Those differences are beyond the scope of my post, but the problem itself is easy to fix. As print is considered a function in Python 3, it requires parentheses to work correctly:
print ("LED off")Troubleshooting: Blocked SMTP Port
The original script sets the smtp_port to 25. This wouldn’t be a problem if my Raspberry Pi Zero was sending the emails. However, here I’m using Google’s Gmail SMTP server to send emails instead.
TCP port 25 is frequently blocked by Internet Service Providers, including Google, as an anti-spam technique. ISPs prefer port 587 as it is more advanced and supports secure communication via Transport Layer Security (TLS).
TLS enables secure and trustworthy communication. This security requires some additional information to work properly though…
Troubleshooting: Missing SMTP Methods
This is the section of the sample script that handles sending emails:
smtpObj = smtplib.SMTP(smtp_host, smtp_port)
smtpObj.login(smtp_username, smtp_password)
smtpObj.sendmail(smtp_sender, smtp_receivers, smtp_message)- The first line sends a request to
smtp.gmail.comon TCP port25. - The second line provides a user name and password for
smtp.gmail.com - Lastly, strings are given for the email sender, the recipients and what the email says.
In its current form this request will be rejected, as Gmail blocks TCP port 25. Initially, I just changed the port from 25 to 587 and ran the script again. This still didn’t work so I continued my research.
Having consulted Stack Overflow and Python’s smtplib documentation I realised that the script needed some additional methods. The sendEmail function needed two extra lines:
smtpObj = smtplib.SMTP(smtp_host, smtp_port)
smtpObj.ehlo()
smtpObj.starttls()
smtpObj.login(smtp_username, smtp_password)
smtpObj.sendmail(smtp_sender, smtp_receivers, smtp_message)
With the move to TCP port 587 and TLS, these new methods are needed to correctly introduce the script (and by extension the Raspberry Pi) to the Gmail SMTP server.
SMTP.ehlo opens communication between the script and Gmail. The script identifies itself via the Raspberry Pi’s fully qualified domain name, giving Gmail a way to identify the source of the request.
SMTP.starttls then asks Gmail if it supports TLS encryption. Gmail replies that it does, and all SMTP commands that follow are encrypted.
That’ll work now, right? Right?!
Troubleshooting: Insufficient Authentication
Even after these changes I was still getting problems. A Stack Abuse article suggested enabling the Less Secure App Access setting of my Gmail account. It turns out that Google and I have something in common – neither of us is keen on plain-text passwords flying around the Internet.
Google had to find some sort of middle ground and came up with this setting:
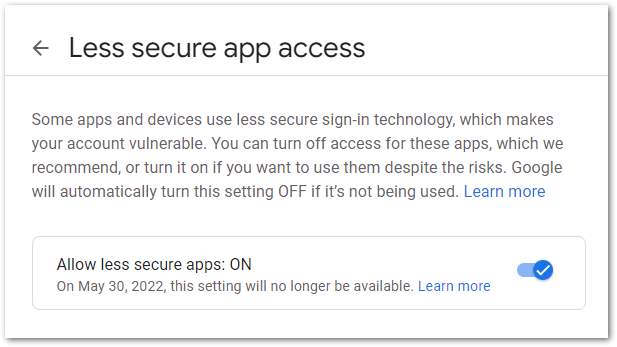
It is disabled by default and can’t be enabled on accounts with active MFA. Google are actively in the process of removing this setting, and will no longer support it from the end of May 2022. But for now this should be enough to get the emails flowing.
Retesting The Sensor
I ran the script again and got the feedback I was hoping for:
Python 3.9.2 (/usr/bin/python3)
>>> %Run moisture.py
LED off
Successfully sent email
LED on
Successfully sent email
And a string of emails in my inbox:
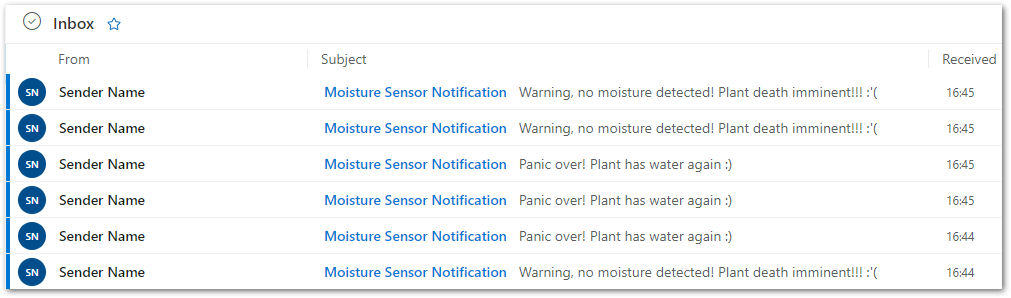
Success!
Next Steps
Although this approach does work, it isn’t ideal for several reasons and will stop working completely when Google pull the plug on the Less Secure App Access setting. There are a number of changes I want to make.
Use AWS For Emails Instead Of Python
Sending emails via Python caused the bulk of the problems here. The approach this script uses is not secure and will soon be unsupported by the third party it relies on.
I could set up the Raspberry Pi in such a way that it could send emails itself, but ideally I want the Raspberry Pi to be doing as little work as possible with as few credentials as possible.
Enter AWS. I’ve already used SNS a number of times for emails, and the various AWS IoT services offer several options for communication with my device. This would let me decouple the email functionality from the sensor functionality.
In addition, AWS can handle the security side of things. Instead of my Raspberry Pi having root credentials for a Google account, it can have an AWS IoT certificate that will only allow specific actions.
Disable Google Less Secure App Access Setting
If AWS are handling the emails then I don’t need to use the smtplib library anymore. Which means I don’t need to use the Gmail SMTP. Which means I can disable the Less Secure App Access setting!
Google is sending me security warnings about this on almost a weekly basis at the moment. They want this OFF. So I want this off too.
Control Email Frequency
As the earlier screenshot showed, I got hammered with emails by the script. I would prefer to get emails based on a series of events or periods of time instead of a blow-by-blow account. CloudWatch is an obvious candidate here, and AWS IoT Events may also be a contender.
Monitor Device Health
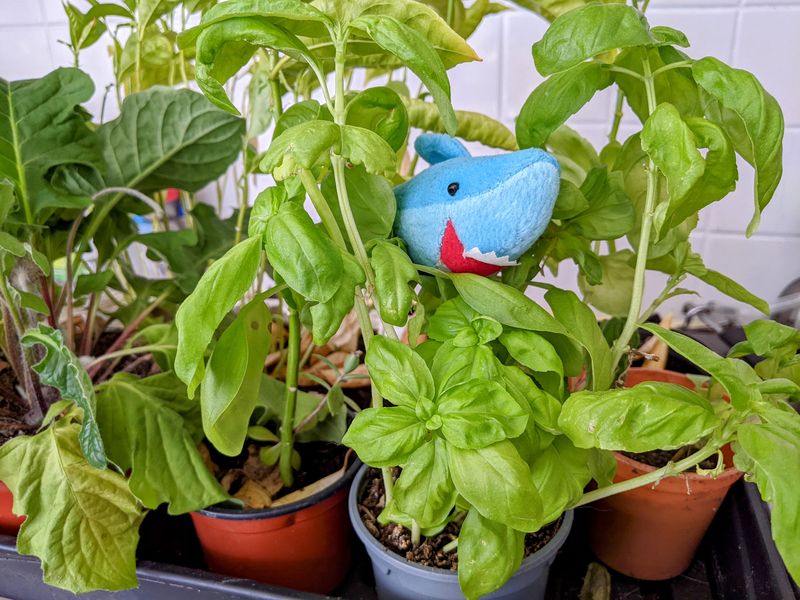
Finally, there’s the question of device health. Any number of problems could occur with the current setup. The sensor could stop working (soil is acidic after all). There could be a power cut. Wolfie could knock everything over. In all of these situations, nothing happens. The readings just stop.
With AWS I can monitor the flow of data. I can look for periods with no data, and set alarms based on those periods. I might have to adjust how the Python script reads the outputs from the sensor, but at least I’ll know that the sensor is working and that my plant is lush and green instead of brown and crisp.
Summary
In this post I have set up my new Raspberry Pi Zero, wired up a moisture sensor and used Python to convert the sensor data into email alerts. I have modernised the Python script and removed syntax errors, and have identified areas where I can improve the security, reliability and operational excellence of the overall solution.
If this post has been useful, please feel free to follow me on the following platforms for future updates:
Thanks for reading ~~^~~